Building the Buck
The remaining photos are from Ron's shop in Cottage Grove, Oregon and some were taken by Ron.
The first step in building is to construct the "buck," which provides a 3-D shape for holding and test-fitting the cowling pieces. Ron built this buck from the Paul Matt 3-D drawings of the Ryan SC-W. It is reasonably close to the right size, which is good enough since the exact fit-up happens on the airplane itself. The buck is installed on an automotive engine mount which allows for rotation of the entire assembly.
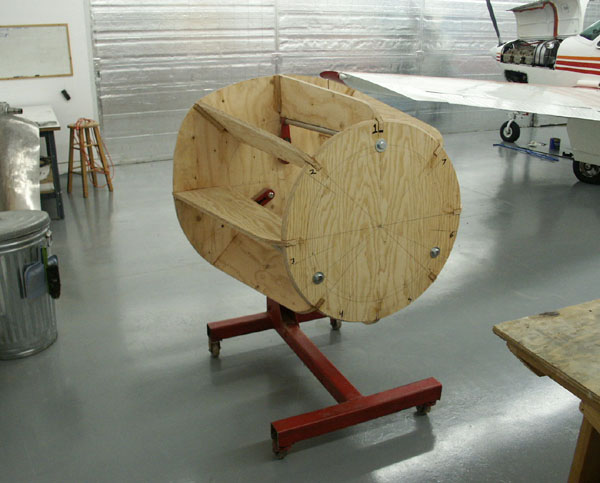
(photo by Ron Englund)
Panel Construction
Each cowling segment is constructed from a piece of 6061-T6 aluminum sheet that starts out flat. It is then rolled or power-hammered into the correct shape. The first step is to put a gentle bend along the short axis of the sheet. Ron uses a curved die on the power hammer for this, which causes a stretch in the metal resulting in a curve. The technique is to use a gentle hammering in rows across the sheet. A little bit of WD-40 is used to lubricate the sheet and keep it from hanging up. The harder the hammering the more severe the bend. Once the entire sheet is hammered it will look like a very open U shape. You can then put a more severe bend on one end by hammering in a localized area in a V-shape.
The power hammer with shrinking dies installed looks like this. There is a rivet gun clamped at the top, and then dies installed in the gun and in the bottom post. The shape and material of the dies, and the hammering strength, results in either a stretch or shrink of the material.
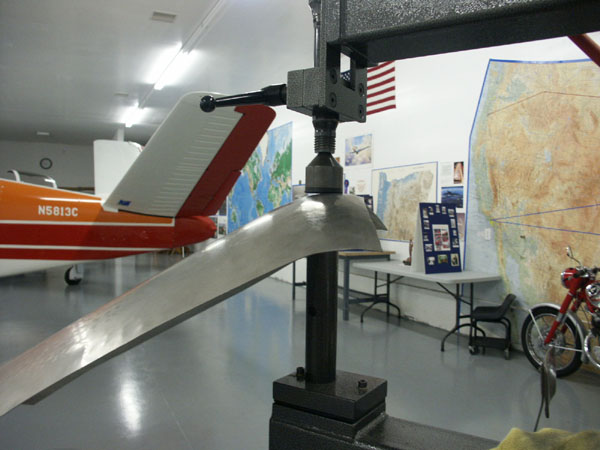
To shape the metal permanently, the metal must be "shrunk" or bunched up in order to pull it into the lip shape that exists at the front of the cowling panels. Shrinking thickens the metal. Metal can also be stretched which as the word connotes will stretch or thin the metal, and curve it in the opposite direction. Depending on where shrinks or stretches are applied, either using pressure and dies or rollers, or by hammering, a complex 3-D shape can be built. It is all about acting in the right place, which takes experience and lots of patience.
For the cowling panels, the next step after the long bend is to change to a shrinking die and shrink the front "lip" where the cowling opens at the front of the engine. It is amazing and counterintuitive to watch the power hammer shrink metal. It works by using polyethylene dies, which "grip" the metal and pull it together as the hammer hits, and by putting "darts" or intentional bends into the front lip, then hammering them flat and shrinking at the same time. The best shrinking happens at the edge of the material, and the curve and shrink can then be "worked" further back on the panel. Obviously for shrinking you don't want lube on the panel.
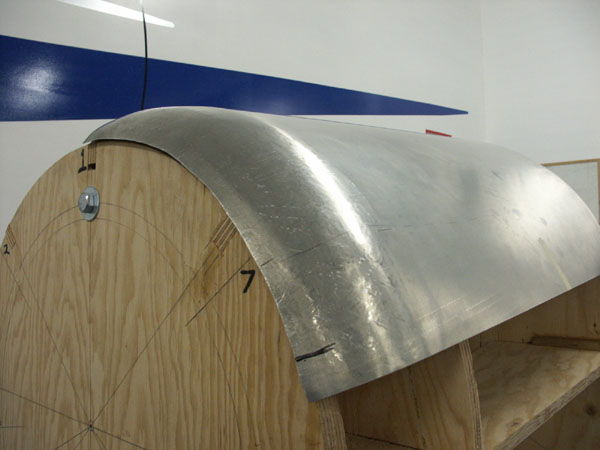
(photo by Ron Englund)
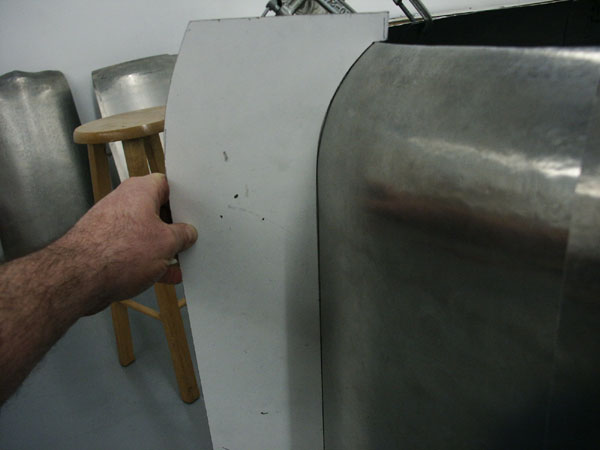
Note that this piece is laying on the buck, holding its curved shape, without any preload or fasteners. This is important since otherwise the metal will be stressed and will tend to ripple, oilcan, or sometimes crack.
While hammering the panels it is necessary to stop every few minutes or so and anneal the material to keep the aluminum soft. Aluminum work hardens, so the more you hit it the harder it gets and the less work gets done. If the metal gets too hard and you work it or bend it then it is likely you'll get a crack instead of forming. To anneal, mark up the area to soften with a Sharpie pen and then apply a propane torch. Keep moving the torch around to heat up a section and keep the heat on until the pen marks fade away. Aluminum melts at a low temperature so you have to keep the heat moving around. If you get the metal too hot then you'll weaken it and likely get cracks in that area, so experiment on some scrap first. If the metal glows you've gotten it too hot.
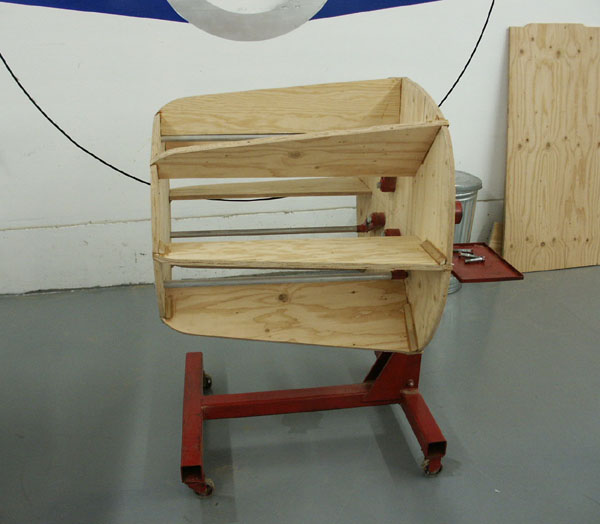
While forming the metal, the buck is used to check the curves and shape, and templates taken from the original cowling are used to check the exact shape.
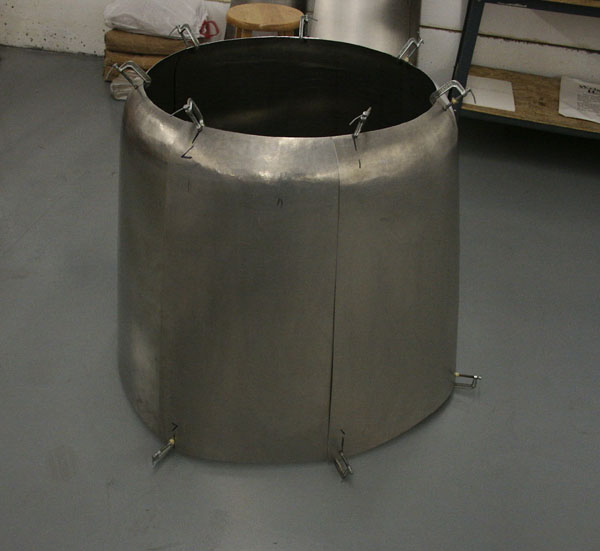
All of the segments put together hold a natural cowling shape:
Next: Adding the Bumps